Reverse Engineering a standing desk to actually make it useful

My adventurers with automating a standing desk and controlling it via an API.

Sitting is the new smoking, and standing desks are all the rage. But they are prohibitively costly, and thus I never paid them much attention.

Recently the company I work for, introduced a WFH plan, where they gave each employee a handsome sum so that they could up their WFH game. I also saw a standing desk at one of my friend’s places and decided its the right time to get one.

One of my friends was using a desk called FlowDesk from a company called FlowLyf. After trying it out, I liked it. I went with the Flowdesk 2 model, as it was big and spacious.

Flowdesk 2 maxx standing desk
Flowdesk 2 Max

During the initial days, there was a lot of sitting, standing and a lot of button pressing involved. But soon, I found myself in a sitting position all day. Turns out, a mere motorized standing desk cannot compete with epic laziness. So, I went ahead and did what any respectable engineer would do – Automating my standing desk.

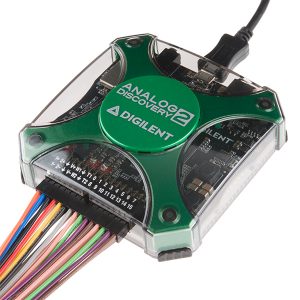
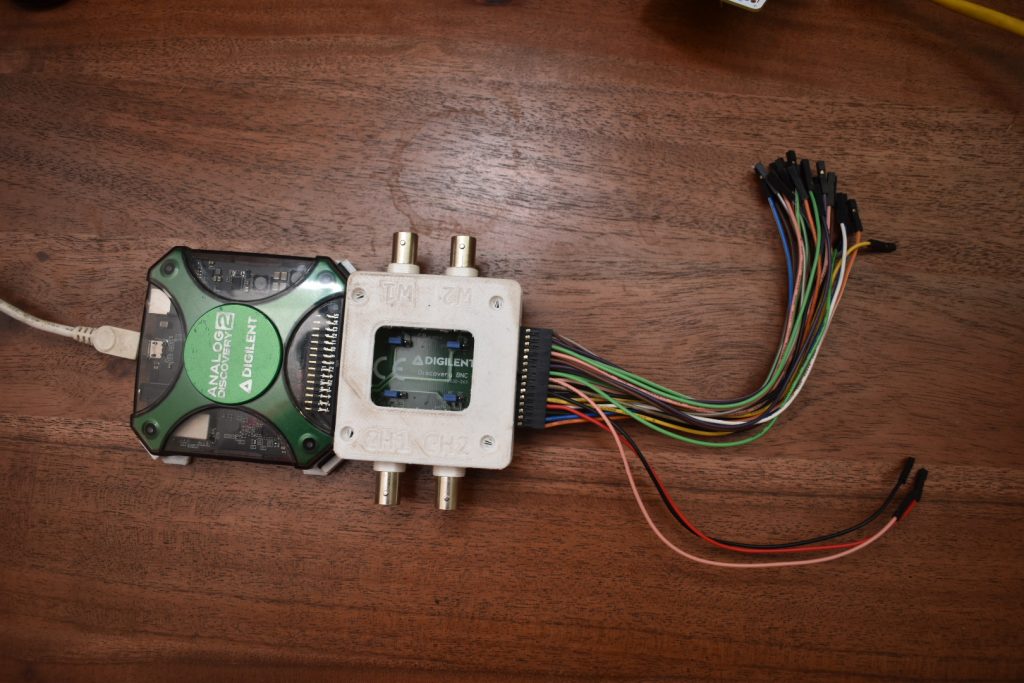
Now, I am not a seasoned electronics engineer. I am a computer engineer with a bit of electronics knowledge. But there is one thing that I do have – a love of buying things. And so I happen to have Analogue Discovery 2 – A logic analyzer.

Analogue discovery 2
Analogue Discovery 2

Inspecting the hardware

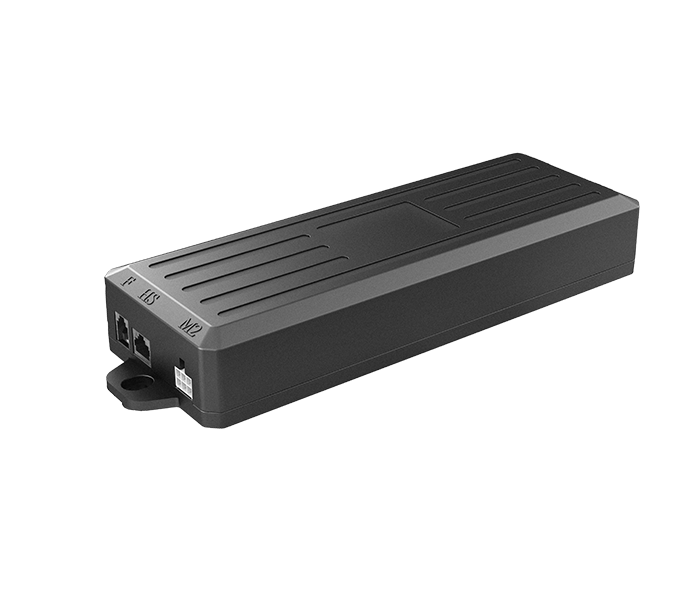
The desk itself has two linear actuators controlled by a central control box. The user interface is a panel with a segment-based display and a few buttons ( UP, DOWN, memory button, and position buttons ). This panel is connected to the control box via a cat5 cable ( RJ45 Connector ).

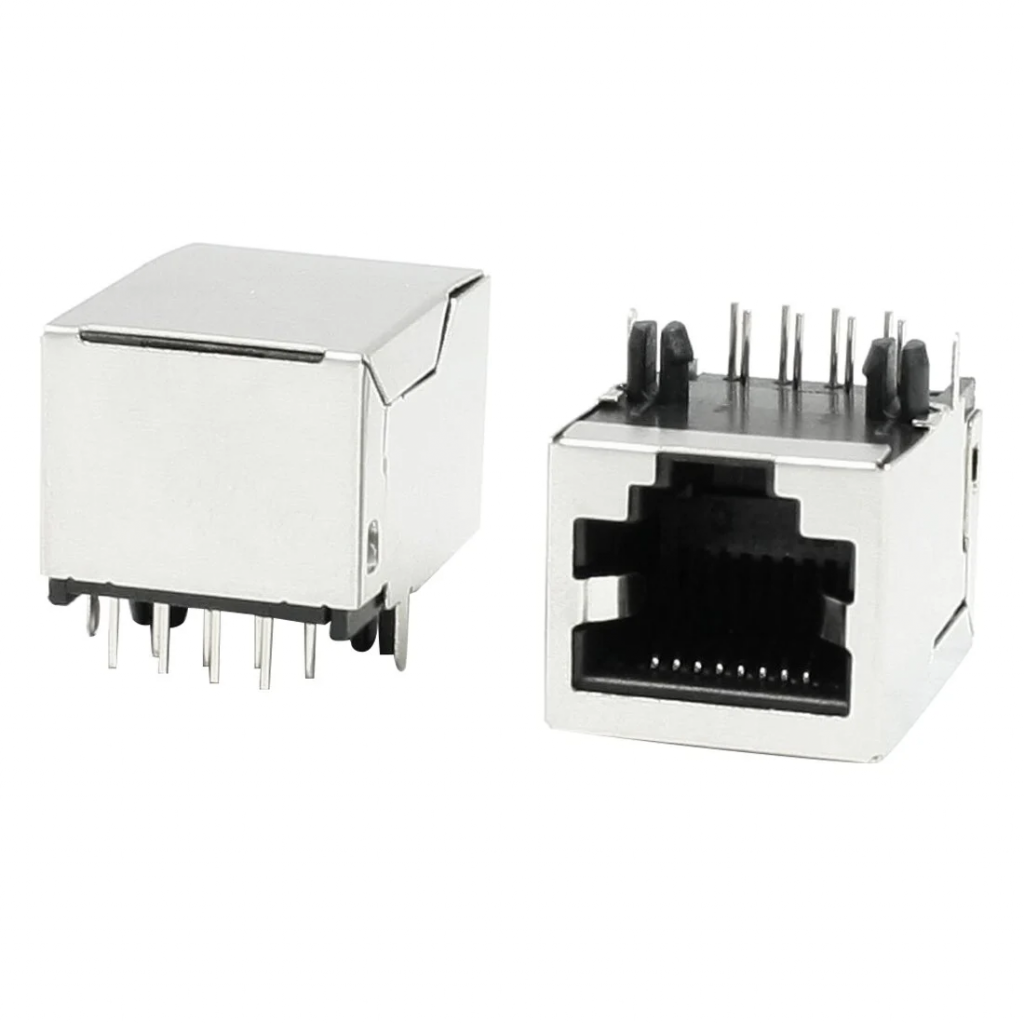
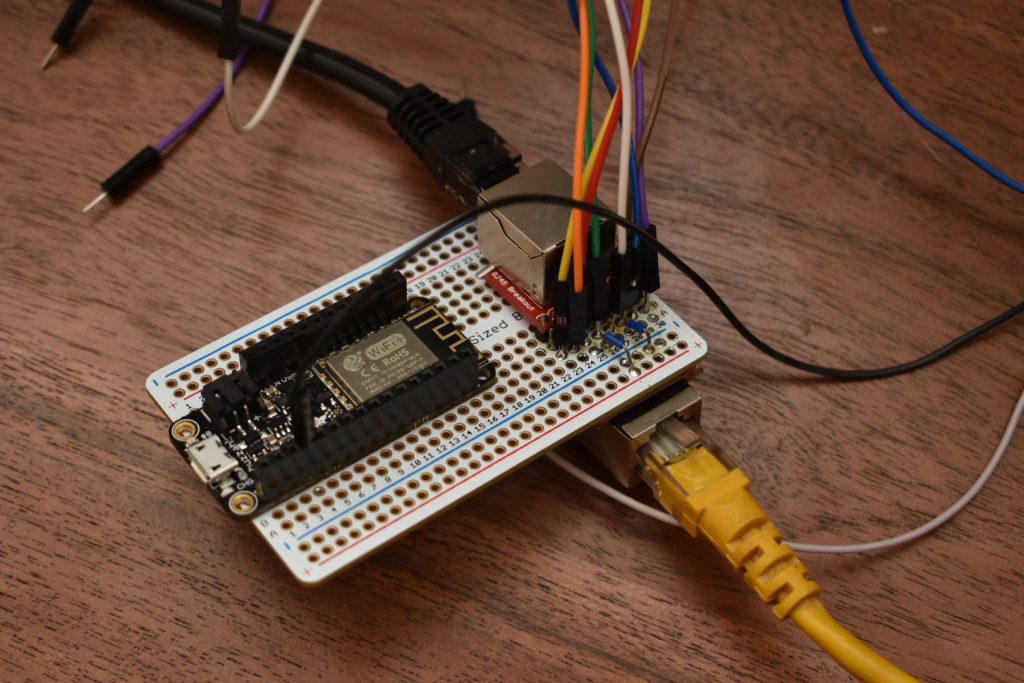
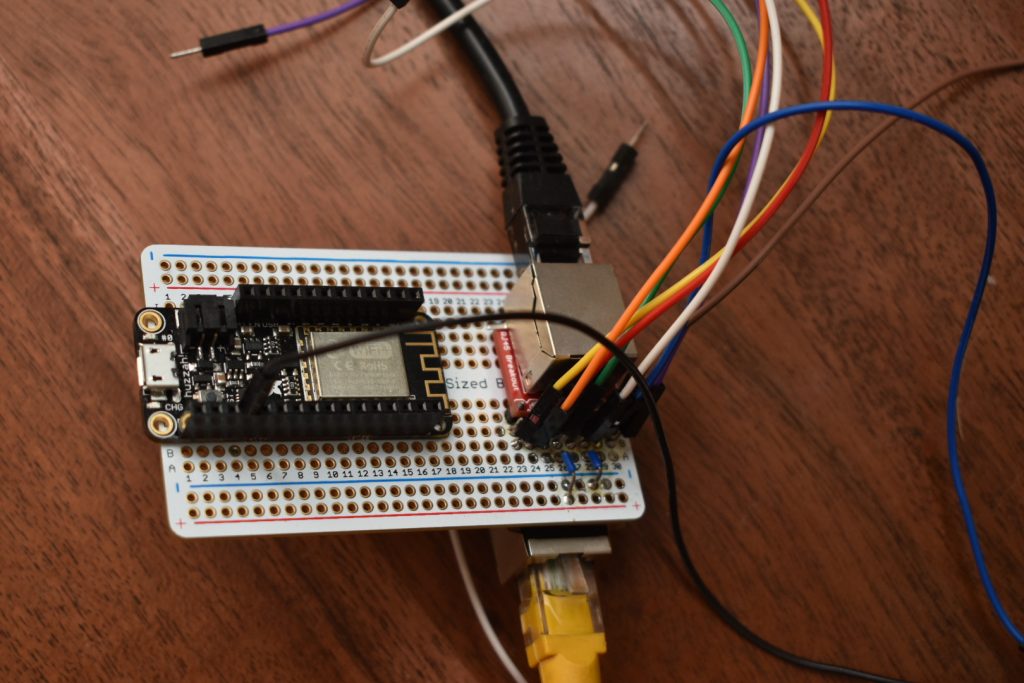
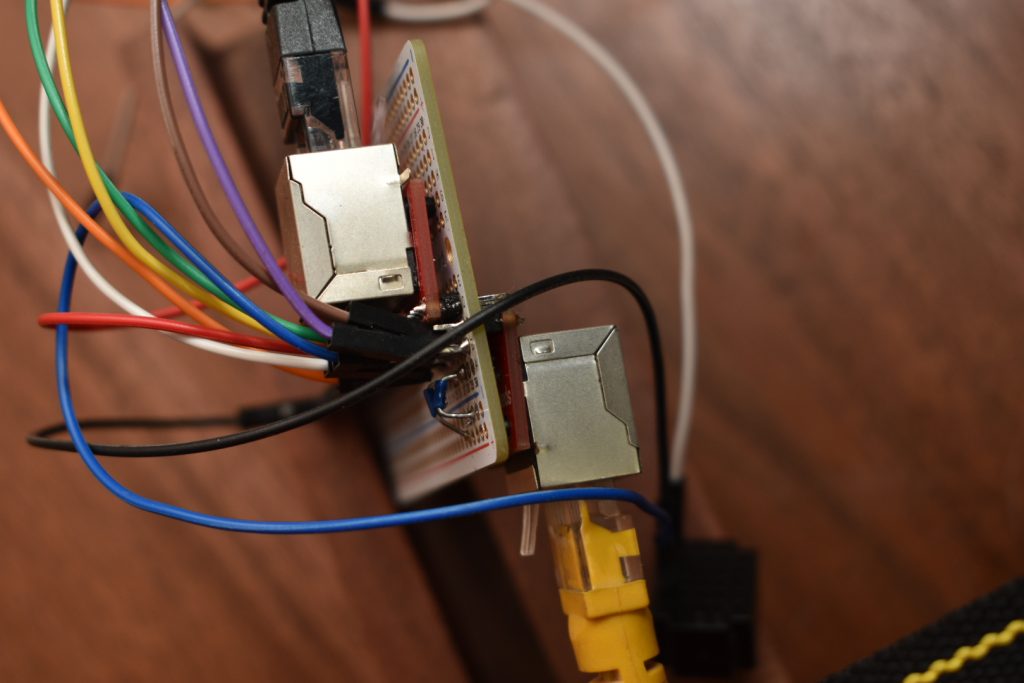
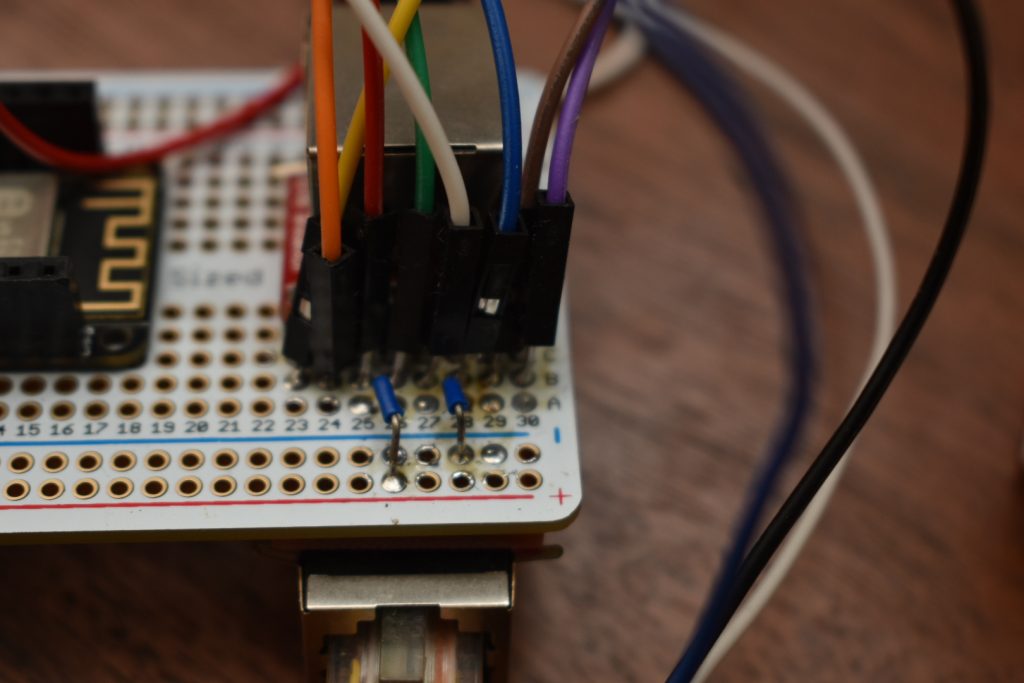
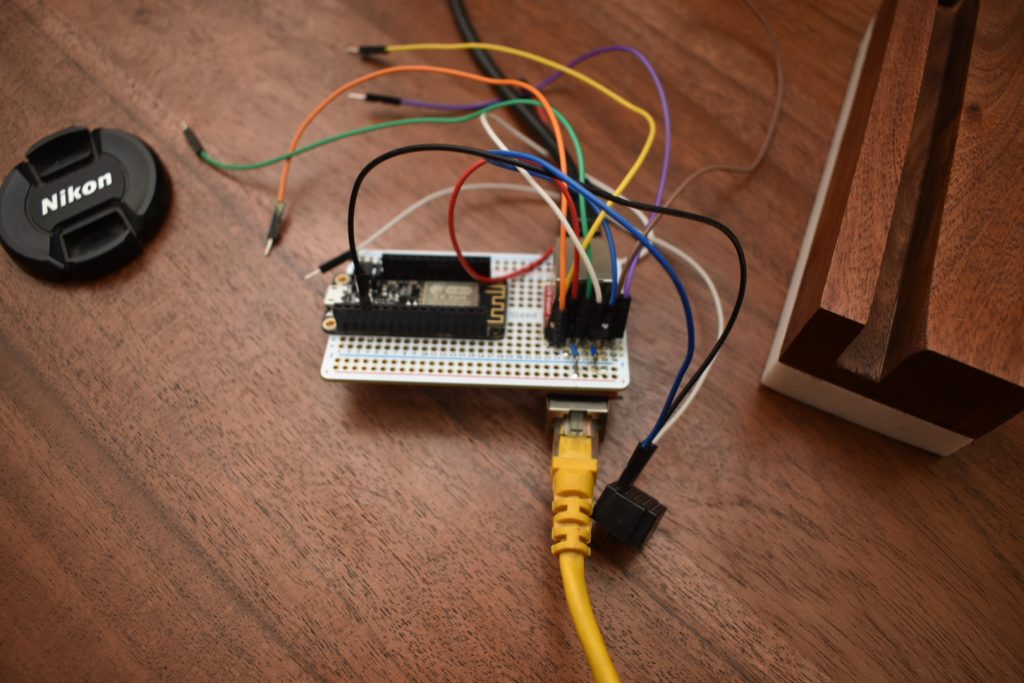
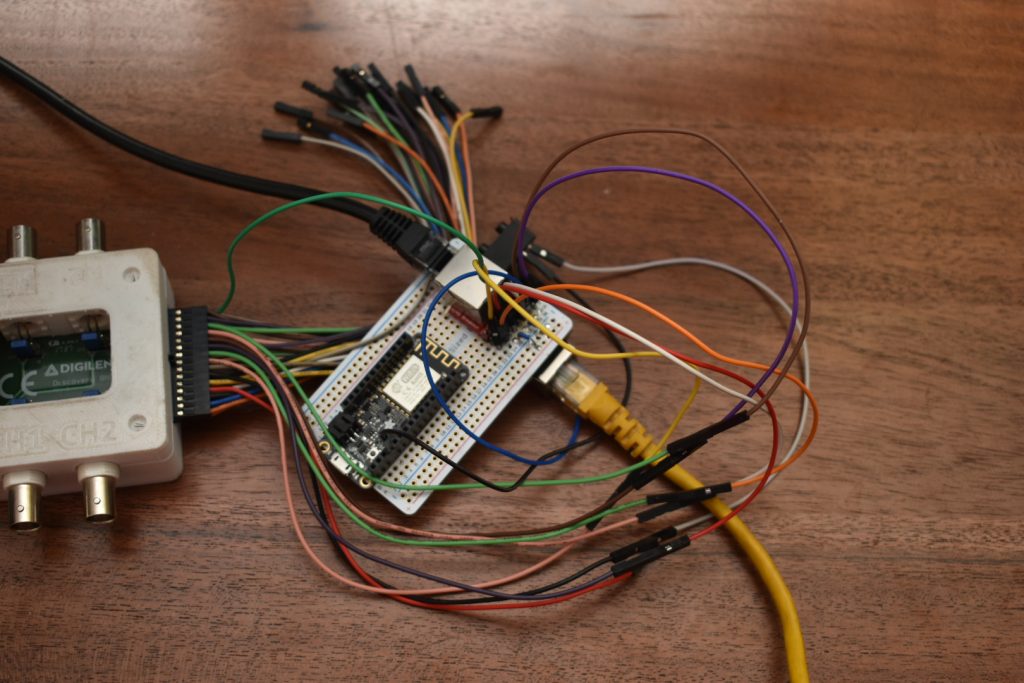
I wanted to spy on the communication between the desk control panel and the controller. So, I made a sort of passthrough for the cable, via two RJ45 ports. a Sparkfun RJ45 Breakout board was used for this. I also used a breadboard for initial prototyping which I later replaced with Adafruit breadboard PCB(before posting the article).

Identifying the pins

The first step would be to identify the GND and VCC pins. This desk has a 5v USB charger built into the control panel. The easiest part is finding the VCC pin by touching the negative terminal to the ground area of the USB connector. And then looking for a pin with either a 5v or a 12v non-changing voltage.

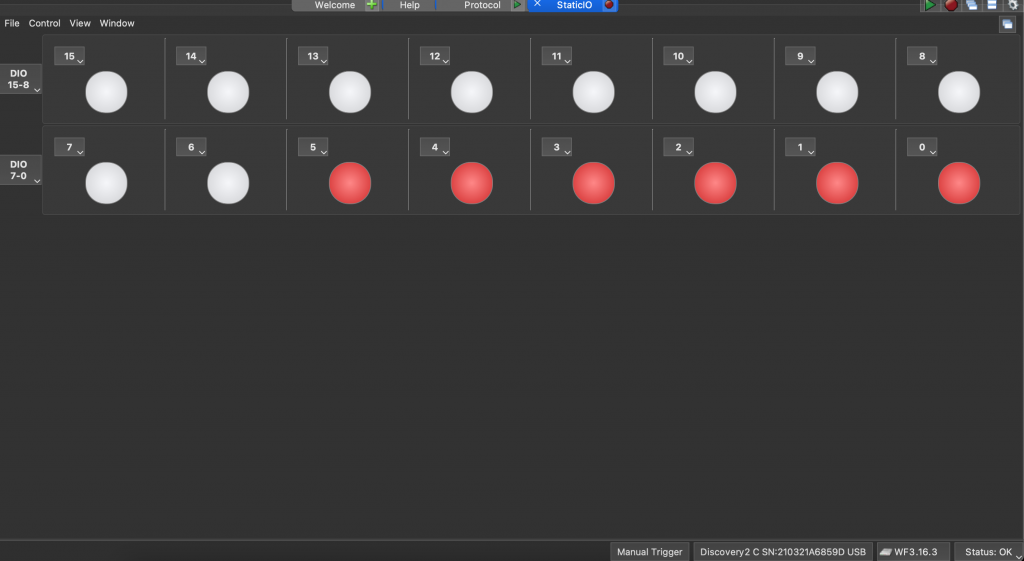
After the identification of GND and VCC pins, the next step would be to find if there is any kind of data communication ( SPI/UART/I2C ), etc on any of these pins. This one was pretty simple. I hooked all the pins ( except VCC and GND ) to data pins on my logic analyzer and then observed the static IO( the software I used is Waveforms, and comes with the Analogue Discovery 2 ).

The pins where there is constant flicker ( i.e a mix of highs and lows ) are the data pins. Be sure to hook the ground from the desk to your logic analyzer ground so the GND is common.

Next, I pressed all the buttons one by one and observed the static IO. On pressing the memory buttons, we always get a combination of pins to go low. As we have only limited GPIO lines, any extra buttons are mapped to activation of simultaneous GPIO signals.

Waveforms Static IO screen
The above image doesn’t show light no15, but it was blinking with a low frequency

The next thing I wanted to know was the current height of the table on the control panel. This was possible since the display updated with the correct height when the table up/down/memory position buttons were pressed.

I also knew that there was some data communication happening on a specific pin ( remember the flickering light on one of the pins )? Turns out, it’s the signal coming from the table’s central controller to the remote control panel unit.

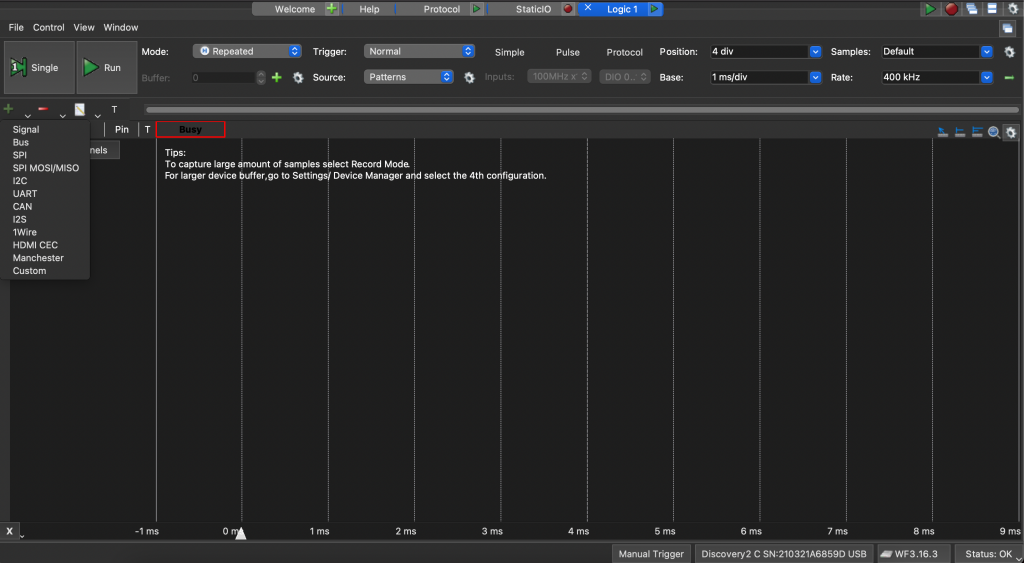
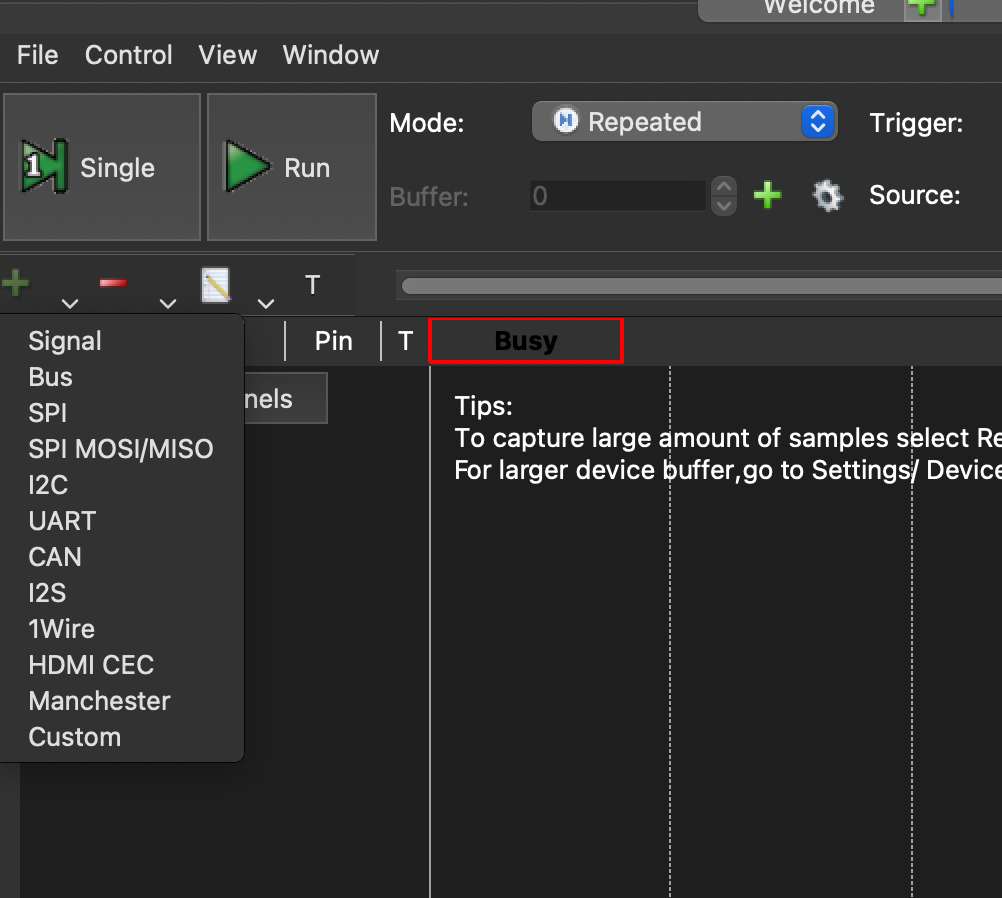
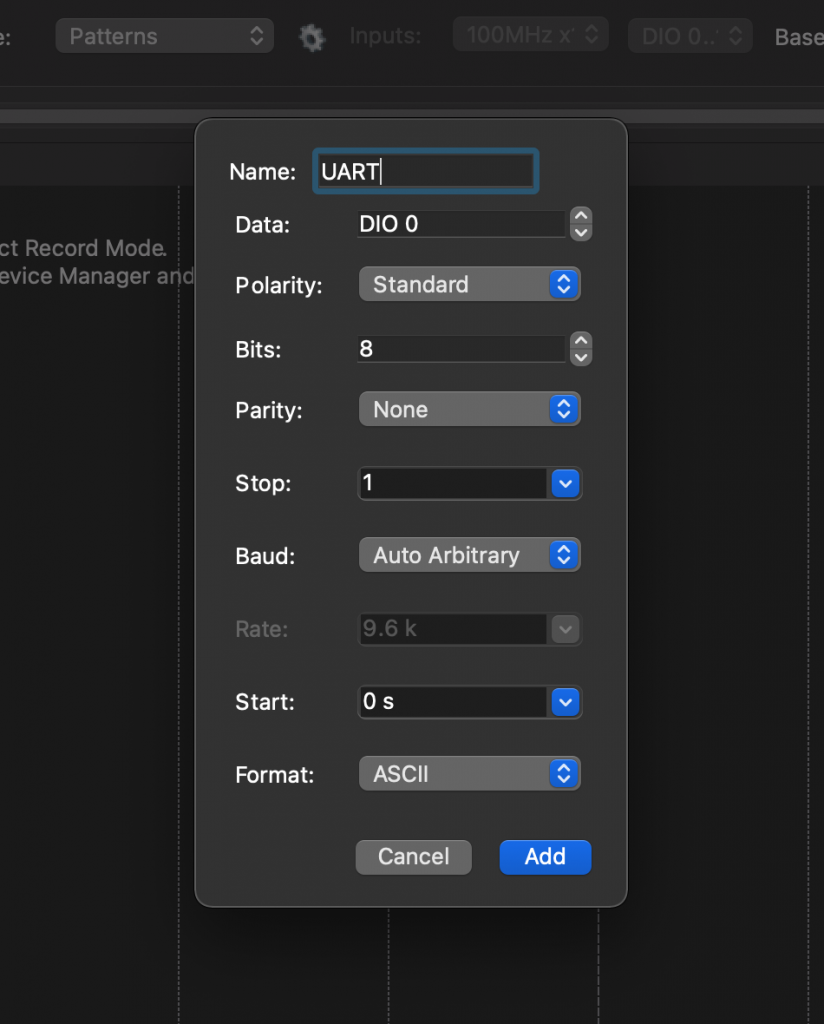
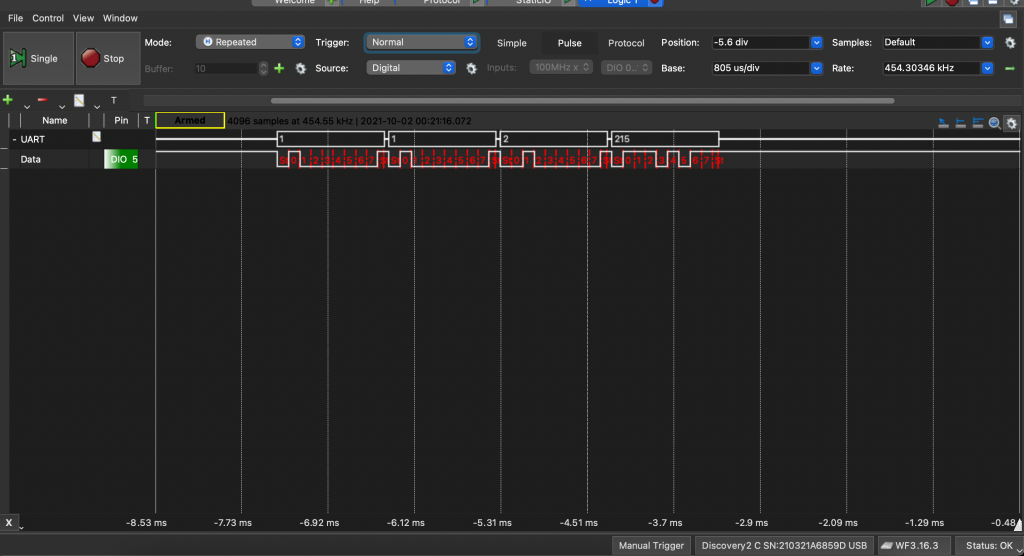
I again fired up my logic analyzer and looked at the signal in the logic pane. I started with UART because it’s the most common protocol for a small amount of data. Also, I had a hunch that it might be UART as I could not see any clock lines ( blinking on a regular static frequency in the static IO panel ) – but again, this was a hunch.

And voila, it was indeed a UART signal, with 8-bit packet 1 start, 1 stop bit, no parity, running at 9600bps.

Decoding the data

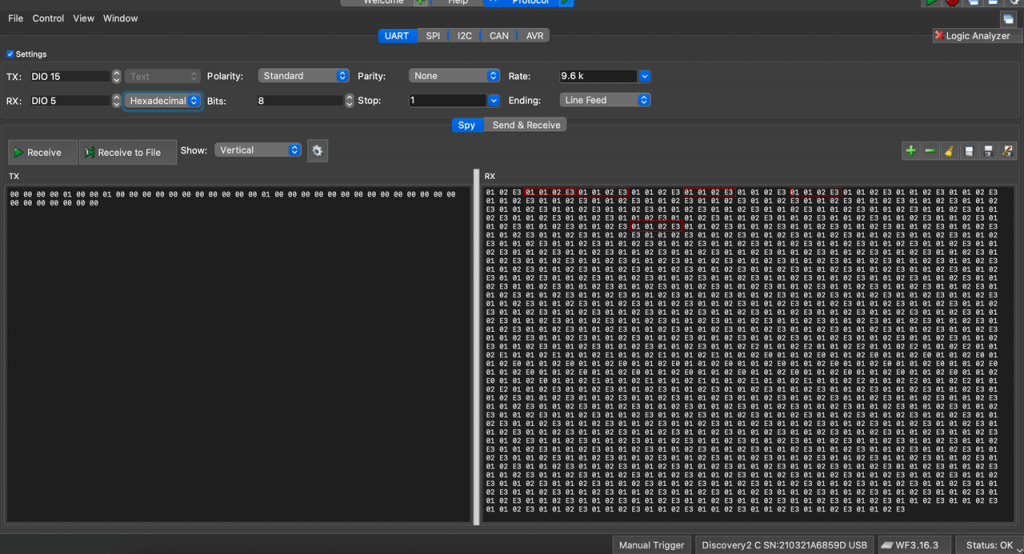
Now comes the hardest part, actually decoding the data. While decoding any data, I always start from repeating patterns, and on close inspection of the RX section above( i will focus on the RX section for now, as I am interested in reading the current height ) – I found that one specific pattern is repeating as illustrated in the scrtionb below.

4 bytes of data being repeated
Repeating patterns

A look at the above screen shows that the value 01 01 02 E3 is repeating. So let’s focus on this value.

This is a 4-byte value, and that the first two bytes are always repeating ( even when I change the height of the desk, it’s the last two bytes that change ). When seen in decimal, it converts to 2 227.

While I was reading these values, the number on the control panel read 73.9 ( inches ). So the above value, in encoded in suck a way that it converts to 73.9.

While reading up on transferring/storing Integer/float values, I came across an article that mentioned little-endian/big-endian encoding, and in the article, it was mentioned that with big-endian, the last byte is always significant/larger.

The values I had looked like a Big Endian encoding, so I used https://www.scadacore.com/tools/programming-calculators/online-hex-converter/ to quickly decode this HEX string into a unit16 string.

On scrolling down, towards the bottom side of the site, we can see this section

1st column shows the value in integer

This confirms that it’s indeed Big Endian encoding, and thus we have decoded the value coming from the desk’s main controller.

The automation

Now, that I have semi-reversed the protocol ( i still don’t know what the other data line does, mostly communication from the control panel to the controller – but I don’t know yet what data is being transmitted ). I could now start with actually automating it so that we can achieve our initial goal – a programmable standing desk.

I had an esp8266 based dev board laying around, so I decided to use it. It has enough GPIOs there is loads of example code for esp8266.

Please note that as per my measurements, the high signal on the GPIO is about 5v, but esp8266 officially is only rated for 3.3v. So, i should have used a level shifter, but I have used 5v on esp8266 GPIOs before – and it does work ( at most ill fry a board – those are cheap enough, and I didn’t want to wait for the level shifter to arrive ). So, I went ahead with directly hooking it to ESP8266 GPIOs.

I used an Adafruit Huzzah Feather ESP8266 board. you can use any that you like. Just make sure to use the correct pins in the Arduino sketch. I connected the pins as shown below.

wiring diagram for the RJ-45 to the adafruit feather huzzah

I do hate Arduino IDE though, it’s mediocre at the best ( have been spoiled by great IDE’s for my front-end work ). So I decided to use PlatformIO ( with VS Studio Code ). I am also attaching the Arduino version for you Arduino junkies out there.

#include <ESP8266WiFi.h>
#include <WiFiClient.h>
#include <ESP8266WebServer.h>
#include <ESP8266mDNS.h>
#include <Arduino.h>
#include <ESP8266WiFi.h>
#include <SoftwareSerial.h>

#define MAX_MILLIS_TO_WAIT 1000  //or whatever
#define DOWNPIN   12
#define UPPIN   13
#define UPOP  1
#define DNOP  2
#define NOOP  0
#define ACTIVATE LOW 
#define DEACTIVATE HIGH
#define DESKMOVEDDURINGREAD 9


SoftwareSerial deskSerial(5,4);

#ifndef STASSID
#define STASSID "Your SSID"
#define STAPSK  "Your pass"
#endif

int currentOperation = NOOP;
unsigned long starttime;
const char* ssid = STASSID;
const char* password = STAPSK;
unsigned long value;
int RFin_bytes[4]; // The message 4 bytes long
int currentHeight = 0;
int requestedHeight = 0;
int heightMultiplier = 1; 

//Initialize the webserver
ESP8266WebServer server(80);

const int led = LED_BUILTIN;

void handleRoot() {
  digitalWrite(led, 1);
  server.send(200, "text/plain", "hello from esp8266!\r\n");
  digitalWrite(led, 0);
}

/* This method decodes the serial data*/
int decodeSerial() {
  while ( deskSerial.available()<4 ){      
        // hang in this loop until we get 4 bytes of data
  }
  if(deskSerial.available() < 4){
          // the data didn't come in - handle that problem here
        Serial.println("ERROR - Didn't get 4 bytes of data!");
  }
  else{
      for(int n=0; n<4; n++){
        RFin_bytes[n] = deskSerial.read(); // Then: Get them. 
          Serial.println(RFin_bytes[n]);
      }         
  }

  //Serial.println("==========");
  
  uint16_t myInt1 =   (RFin_bytes[2] << 8) + RFin_bytes[3]; // Convert Big Endian to Unit16
  Serial.println(myInt1);
  if(myInt1 > 1259 || myInt1 < 600){
    decodeSerial(); // Wrong value, try again
  }
  return myInt1;
}


/* This method stops moving and sets the requested height to current height */
void stopMoving(void) {
  digitalWrite(DOWNPIN,DEACTIVATE);
  digitalWrite(UPPIN,DEACTIVATE);
  currentHeight = requestedHeight;
  currentOperation = NOOP;
}

void setHeight(int height) {

  int operation = 0;
  requestedHeight = height;
  if(currentHeight > requestedHeight) {
    operation = DNOP;
  };
  if(currentHeight < requestedHeight) {
    operation = UPOP;
  };

  if(currentHeight == requestedHeight) {
    operation = NOOP;
  };
  switch(operation){
    case UPOP:
      digitalWrite(UPPIN,ACTIVATE);
      currentOperation = UPOP;
      Serial.println("going up");
    break;
    case DNOP:
      digitalWrite(DOWNPIN,ACTIVATE);
      currentOperation = DNOP;
      Serial.println("going down");
    break;

    case NOOP:
      currentOperation = NOOP;
      stopMoving();
      break;
    
    default:
      stopMoving();
    break; 
  };
}


void setup(void) {
    deskSerial.begin(9600); // The controller uses 9600 bauds for serial communication 
    Serial.begin(115200); // Use the in built UART for debugging 
    // Disable pullups turned on by espSoftwareSerial library
    pinMode(5, INPUT); 
    pinMode(led, OUTPUT);
    pinMode(DOWNPIN,OUTPUT); // Default is HIGH
    pinMode(UPPIN,OUTPUT);  // Default is high

    pinMode(led, OUTPUT);
    stopMoving(); // Make sure there is no movement on startup
    
    digitalWrite(led, 0);
  
    WiFi.mode(WIFI_STA);
    WiFi.begin(ssid, password);
    Serial.println("");

  // Wait for connection
  while (WiFi.status() != WL_CONNECTED) {
    delay(500);
    Serial.print(".");
  }
  Serial.println("");
  Serial.print("Connected to ");
  Serial.println(ssid);
  Serial.print("IP address: ");
  Serial.println(WiFi.localIP());

  if (MDNS.begin("esp8266")) {
    Serial.println("MDNS responder started");
  }


  server.on("/", handleRoot);

  server.on("/height", []() {
    char hstr[4];
    sprintf(hstr, "%d", currentHeight);
    server.send(200, "text/plain", hstr);
  });

  server.on("/abort", []() {
    stopMoving();
    server.send(200, "text/plain", "Aborted current operation. please wait for some time before sending a new command");
  });

  server.on("/setheight",[]() {
    String message;
    // Stop all ongoing operations 
    if(currentOperation != NOOP) {
      // 409 is conflict status code
      server.send(409, "text/plain", "A height adjustment operation is goin on, please try later");
    }else{
      message = server.arg(0);
      setHeight(atoi(message.c_str()));
      server.send(200, "text/plain", message);  
    }  
  });

  server.begin();
  Serial.println("HTTP server started");
}


// Height should be set in bursts of x ms pulses, as it takes 4ms to read the current height

void loop(void) {

  // the decodeSerial should be only called once in the loop
  currentHeight = decodeSerial();

  // These values come in either 3-4 digits , the last one always being the fractional value
  // i.e 1206 means 120.6 while 655 means 65.5
  if(currentHeight > 999) {
    heightMultiplier = 10;
  }else{
    heightMultiplier = 1;
  } 
  Serial.println("CURR/REQ");
  Serial.println(currentHeight);
  Serial.println(requestedHeight);
  Serial.println("============");

  // This number is not precise, so compare in ball park
  // Based on current height
  // we assume that in the time taken to update the current height
  // the desk has moved by DESKMOVEDDURINGREAD inches
  if(currentOperation == UPOP) {
    if(currentHeight >= requestedHeight - DESKMOVEDDURINGREAD * heightMultiplier){
      stopMoving();
    }
  }
  if(currentOperation == DNOP) {
    if(currentHeight <= requestedHeight + DESKMOVEDDURINGREAD * heightMultiplier){
      stopMoving();
    }
  }
  server.handleClient();
  MDNS.update();
}

So now, we have a webserver running on ESP8266 which can report height and when set, will move the table to the desired height.

To Automate this, any home automation platform can be used(HomeAssistant, OpenHAB etc ) . I prefer Home Assistant, as its python based, but feel free to use your favourite.

Please feel free to offer any suggestions / if you would like me to cover the home assistant automation part as well.

Have fun and happy reverse engineering!
Genetics is not that hard (Sort of )

A few months ago, while aimlessly browsing youtube videos, i came across this great channel The Thought Emporium . I was initially browsing for some SDR / Radio telescopy related stuff and this guy does some of it.

But while watching his other videos, i came across some biology stuff ( he does a lot of those, along with laser / quantum physics and everything in between )

What really got me hooked was a specific video of his. ( Justin ) is Lactose Intolerant. So he went about creating “cure” for his condition. He successfully performed “Gene Therapy” on himself by injecting plasmids ( Basically DNA ) via viruses as delivery mechanisms to his digestive tract which produce the enzyme ( Lactase) which in turn breaks down the primary sugar of milk / milk based food items ( Lactose )

I was really surprised that it was even possible for an individual to accomplish this. So, i decided to investigate further.

Easy way to learn molecular biology basics

I am a engineer by profession and a hacker / scientist by passion. Having no interest in learning anatomy i never considered picking up biology as a hobby, but i had no idea biology ( molecular biology ) would be so fun. So i decided on going through some online stuff. after looking at sheer overwhelming overload of information, i realized that i need something short, to the point resource which is easy to understand and is not a dry “textbook” which makes me sleep whenever i try to read it.

So i came across this book

The Manga Guide to molecular biology
The manga guide to molecular biology

Yep, you read it right. Manga. It’s a very basic guide to building blocks of molecular biology – woven into a story which while mediocre, keeps the flow and pace of information very natural.

DNA & RNA

From this book, i learned the basics of molecular biology – Basically there are 4 nucleotides – Adenine,Thymine,Guanine and Cytocine ( A,T,G,C ) in human DNA. Now due to the molecular structure of these nucleotides, A always bonds with T and G always bonds with C

Almost each cell in the body, contains a nucleus ( depending on the type of organism, and cell type nucleus might be present or absent ). This nucleus contains the DNA, which is a long chains of AT and GC pairs woven together in double helix pattern.

RNA is just a single strand as opposed to the double stranded DNA

Proteins

Proteins are the building blocks of the body, everything in our body ( almost everything ) is made up of proteins. Skin, nails, tissues, Hormones, blood – everything is either a protein, or a combination of multiple types of proteins

Proteins are made up of amino acids, and there are a total of 21 known molecules, which combine in long chains to make up a single protein. The DNA, with its sequence of 3 base pairs ( called codons ) code for one molecule of building block of protein

As you can see from the above image, 3 Base pairs of DNA codes for a instruction of a single molecule of an amino acid( out of 20 possible), and these sequence of amino acids, in turn form long chains, which are proteins .

Out bodies are, in turn made up of Water, proteins and Carbs and lipids ( basically oily, fat-like substances )

Average Human Body Composition

So, to me it all looks very much like computers. The building blocks are binary ( AT might be thought as 1 , GC as 0). Now these 1’s and 0’s together form instructions which form protiens, which can be thought of as macros/function depending on the type of organism. now these functions combine together to form larger Routines ( Lets consider them as objects maybe ? – analogous to cells) which in turn makes up the entire program ( body ) work.

What really fascinates me is, a lot of these DNA sequences are shared between different organisms .

Image courtesy 23andme

So essentially, what it means is the building blocks for all organisms are same. and what we can do, is pick-up/isolate traits/genetic makeup from one organism and plant it into other organism(okay its wayyy more complex than it sounds), and that is my friends – Bioengineering.

Over the next few articles, ill go into various concepts of bioengineering, equipment builds, and a “Hello World” of bioengineering. Yes, its a costly hobby, but its magical to see your experiments manifest in living organism.I will be majorly working with Plants & Microbes initially due to ethical reasons – At least till i have learned enough to not screw things up royally.

Here is a teaser of whats to come

  1. The hello World of biotech, Bacterial Transformation of E.Coli Bacteria using GFP Plasmid (Essentially, modifying the E.Coli bacteria with DNA from Jellyfish to produce green florescence)
  2. DIY Biolab – Making your own DIY-Biolab ( India specific version )

Happy (Bio) Hacking 🙂

Reverse Engineering a wireless doorbell and performing a replay attack – Part1

I have a two-floor individual house and I am generally upstairs with my headphones on and the main door locked. Because of this, neither my grandparents (living downstairs) nor the visitors are able to reach me

So I decided to install a doorbell and settled on the below-shown doorbell from Amazon India, the problem is, this bell has two receivers and one transmitter. This solved my visitor issue( one receiver upstairs ) but my grandparents were still not able to reach me. So I obviously did not buy a new bell and decided to reverse engineer this bell itself to make a second transmitter.

Doorbell ( Phoenix waterproof doorbell ) @ Amazon.in
Phoenix wireless doorbell @Amazon.in

Reverse Engineering the transmission signal

The next step is to figure out which frequency band the transmitter is operating on. We can do this with an SDR and SDR software. You have various choices for the software, but I prefer either SDR# ( Windows ) or GQRX ( Linux and Mac )
https://airspy.com/download/ ( SDR#)
http://gqrx.dk/download (GQRX )

I had an SDR( Software defined radio ) lying around ( RTL-SDR v3 ), so I decided to use it. You can buy one from RadioJitter in India. These guys are official distributors for the RTL-SDR dongle.

RTL-SDR v3
rtl-sdr V3

This SDR is widely supported in various software.

Before you plug in the SDR to your USB port, make sure the antenna is connected.

Doorbell Frequencies

Depending on which country you are in, there are some frequency bands allowed by the government for general purpose use. For example in India, they are 433mhz and 865-867mhz. However, if you have cheap Chinese clones, they sometimes disregard the law and might operate on different frequencies
Here are the common frequencies consumer RF equipment generally operate on:

  • 315Mhz
  • 433Mhz
  • 915mhz

This Wikipedia article covers ism band( industrial, scientific and medical) across various countries. https://en.wikipedia.org/wiki/ISM_band

If you cannot find your signal around these frequencies ( these are actually bands, the width of the band varies, for example for 433mhz, the bandwidth is 1.7Mhz and center is 433.93Mhz which essentially means the bell can operate +- 1.72 Mhz from 433.92Mhz ( in India )

Let’s fire up GQRX( or SDR# depending on your OS ) and see which frequency our doorbell is transmitting at!

Video of Using GQRX to select the correct frequency

As the above video shows, the remote is transmitting at roughly 433.86Mhz. We don’t really need to know the exact frequency, as these transmitters ( and receivers ) generally work across a wide band, not just the mid-frequency of that band ( in our case, the mid-frequency for 433 MHz band is 433.92Mhz )

Now that we know the frequency of our doorbell transmitter, lets capture and analyze the signal

Capturing and Analysing the Signal

We can use various tools to capture the signal. As we already have the SDR, we will use it as the hardware. We can use either command line tools or the SDR software itself to record the signal. The signal itself is a waveform, so we can capture it as an audio and analyze it later using various tools. Both GQRX and SDR# offers functionality to capture the signal, however, I prefer command line tools.

#1 Using RTL_433

We will be using a tool called rtl_433 to capture the data. This tool offers various analysis options also and is very feature rich. You can download it from

https://github.com/merbanan/rtl_433

Once installed ( as per instructions mentioned in the link above ) open your command line and type the following command

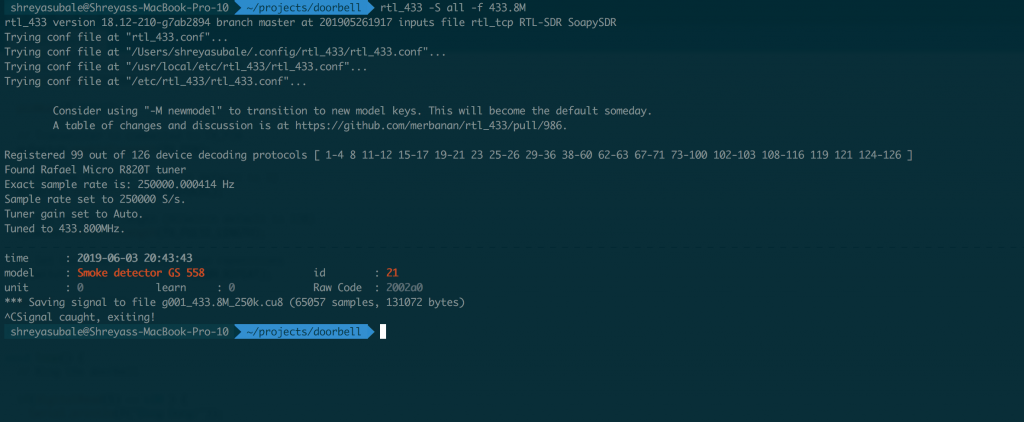
rtl_433 -S all -f 433.83M

where 433.8Mhz is the frequency we figured out earlier from GQRX. -S stands for save all signals, -f specifies the frequency. This command will save the signals received by the SDR into a file in the current directory.

capturing and saving the transmitted signal via rtl_433

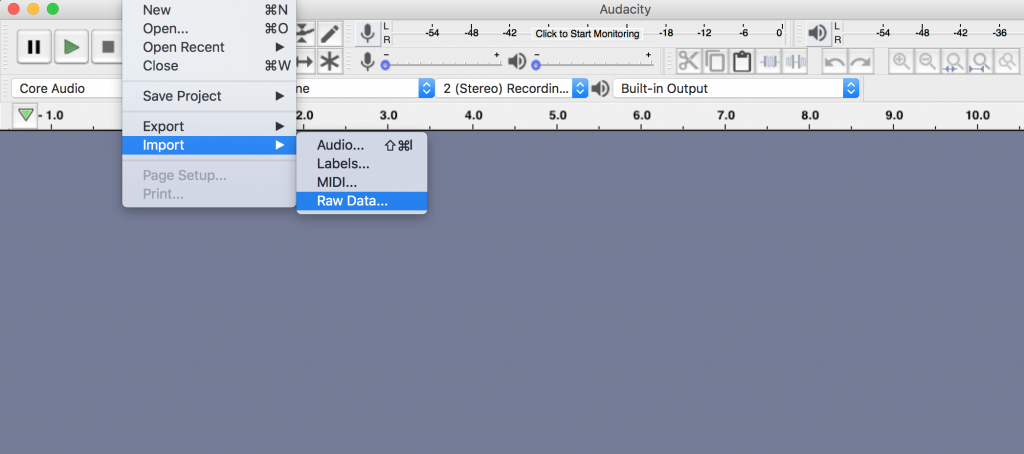
The above screenshot shows that the rtl_433 tool was able to capture and save the signal in a file called g001_433_8M_250k.cu8. Now we can analyze the waveform. We will use an open source audio editing tool called Audacity (https://sourceforge.net/projects/audacity/) for this. Install and open the tool, and then click on File -> Import -> Raw data

Importing the raw file generated via rtl_433 tool.

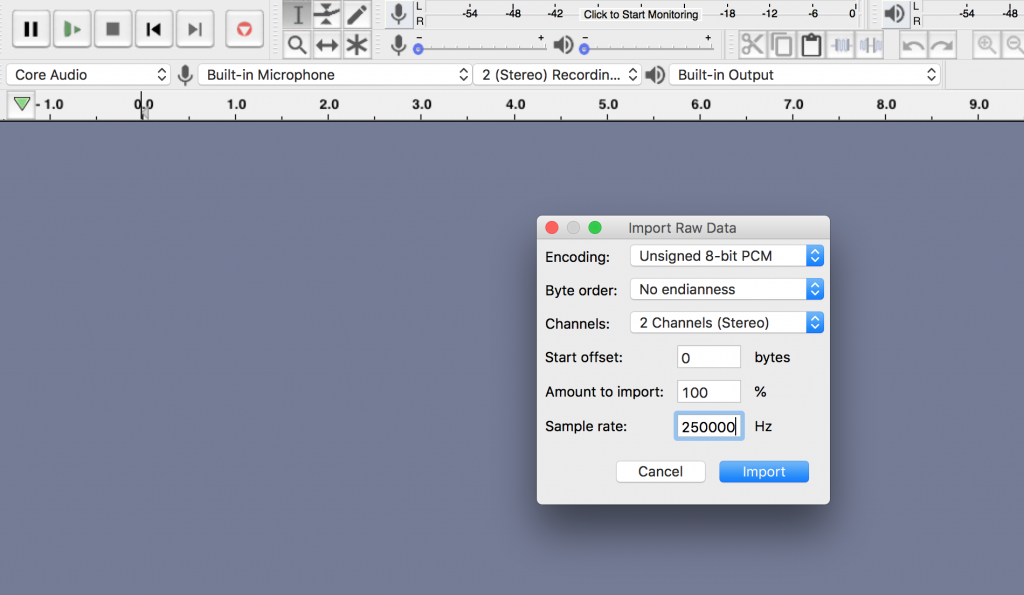
Then use the following settings :

Encoding : Unsigned 8 bit PCM
Byte Order : No endianness
channels : 2
sample rate : 250000

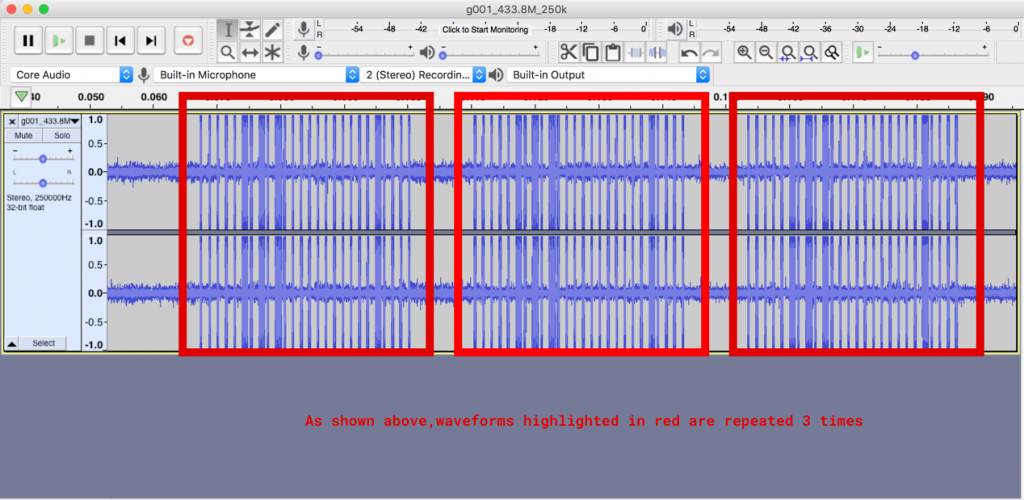
Now zoom in, you should be able to see the following output

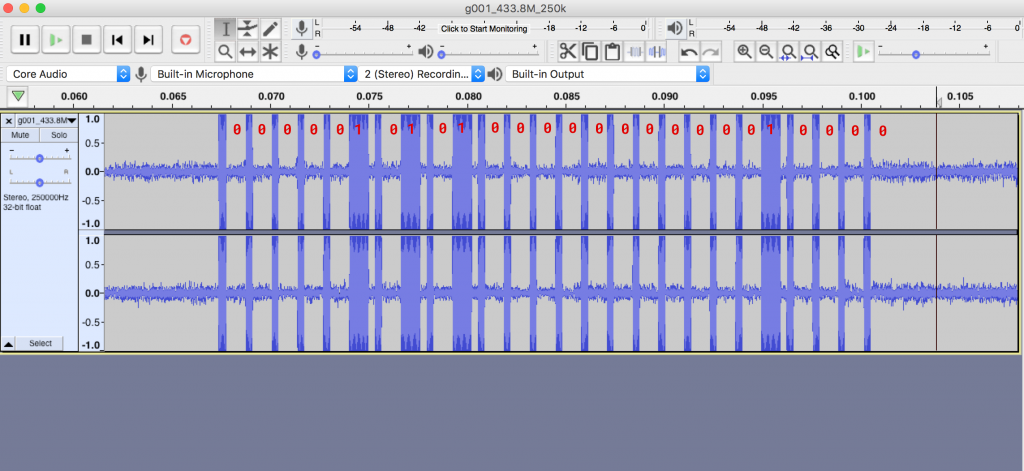
3 repetitions of the same signal

This shows the waveform that was captured. You will be able to see here that the same pattern is being repeated 3 times. Now let’s zoom in and try to make sense of one repetition of this waveform.

The thick lines are 1 and the gaps are 0. The thin lines are the separators

If you know digital electronics, you know that a high signal is treated as 1 and a low signal is treated as 0. Here we can see that the gap will be 0 and the thick peaks will be one. The small line diving can be thought of as a separator. That is how we get our binary representation of the waveform, which is 00000101010000000000010000

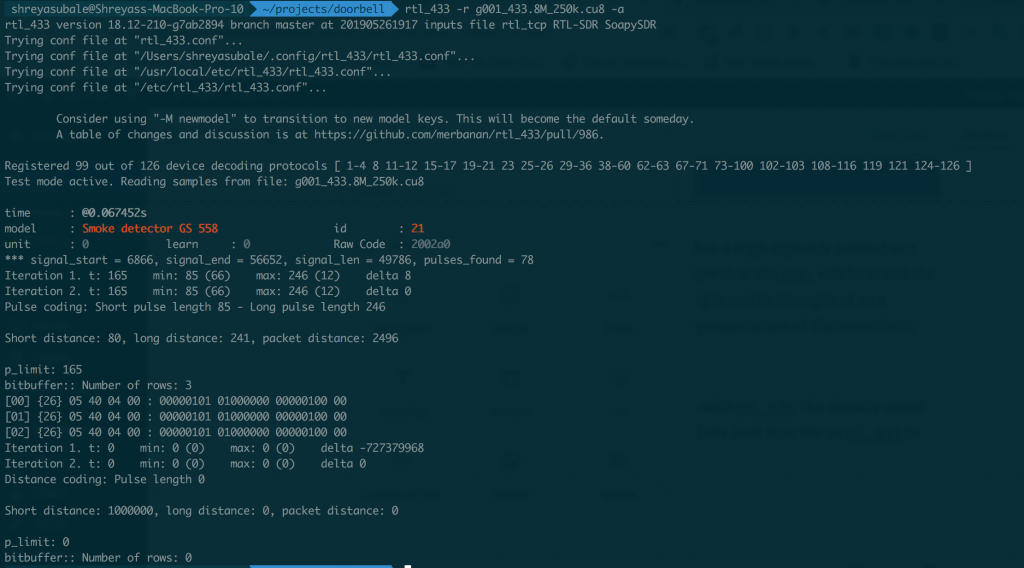
To make this step easy, let’s try doing this with rtl_433. We already saved the waveform as g001_433.8M_250k.cu8. Lets load that file in rtl_433 in analysis mode

rtl_433 -r g001_433.8M_250k.cu8 -a
output of the command rtl_433 -r g001_433.8M_250k.cu8 -a

The output of the command confirms our findings with the manual waveform analysis. We also see that the length is 26bits and the long pulse length is 246. We also see that the same signal is being repeated 3 times.

Now we have everything we need to replicate the signal. We can use various methods to transmit this signal ( we will be covering these methods in other parts of this tutorial. For now, let’s use a 433mhz transmitter module ( you can get it from Amazon ) and Arduino. The module looks like this

433mhz transmitter and reciever
433Mhz transmitter and receiver. The smaller one is the transmitter. We will be using this in our exercise. Clicking on the image will take you to the amazon page.

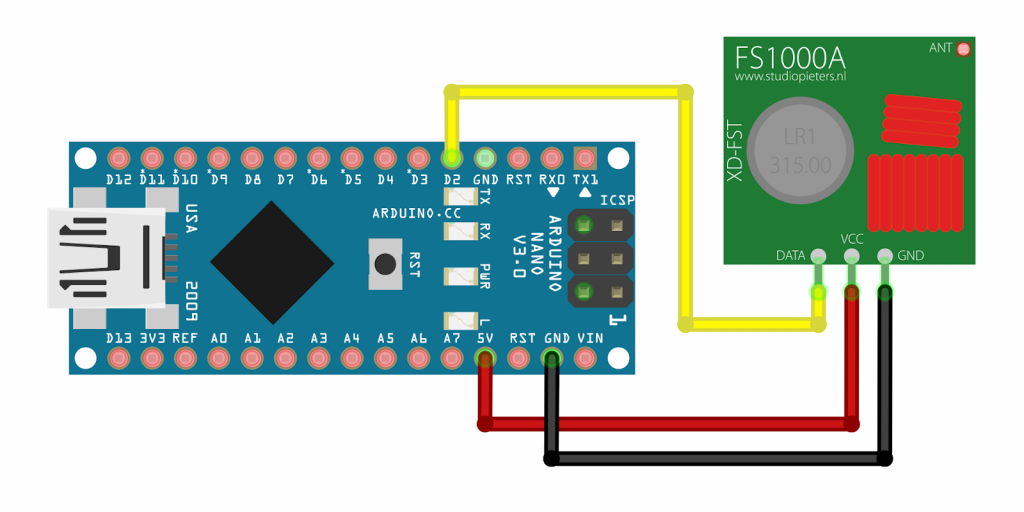
Now, let’s see how to connect the module to the arduino. We will be using an arduino nano for this.

Your transmitter might look different, however, it will have a data, antenna, VCC and GND pin. Connect the VCC to 5v of nano, GND to GND pin. You can simply connect a wire to an antenna. image courtesy http://www.ignorantofthings.com

The above shows the typical wiring diagram. the data pin can be connected to any digital IO pin. In the above diagram, we are using pin D2. Make sure to power the transmitter with at least 5V ( i tried with 3.3V and found later the minimum required voltage is 3.7V as per the specs.

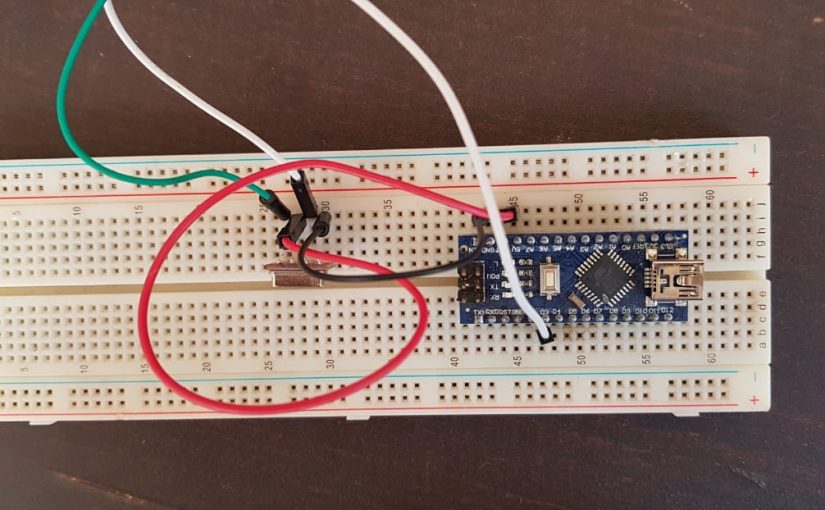
After prototyping on breadboard, my setup looked like this

Doorbell transmitter on a breadboard

I have used a library called RCSwitch for transmitting the radio signal. This library makes it easy to send the pulses with correct timing.you can download it from https://github.com/sui77/rc-switch. It can also be installed via the Arduino’s library manager ( just search for RCSwitch )


// by Shreyas ubale 
// Jun 14, 2019

#include <RCSwitch.h>

#define TX_PIN 2
// The transmitter is connected to pin 2

// Set the numer of transmission repetitions
#define TX_NUM_REPEAT 3

// Set the pulse length
#define TX_PULSE_LENGTH 320

// The inverted signal received by the SDR using rtl_433 or
// manually decoded from the raw signal
//
// Example:
//   original: 1111100110101110011010111
//   inverted: 0000011001010001100101000
#define TX_SIGNAL "0000010101000000000001000"


RCSwitch mySwitch = RCSwitch();
void setup() {
  // Set the serial baud rate to 115200
  Serial.begin(115200);

  // Automatically sets the TX_PIN to output mode
  mySwitch.enableTransmit(TX_PIN);
  
  // Set the pulse length (RCSwitch default is 320)
  mySwitch.setPulseLength(TX_PULSE_LENGTH);

  // Set the numer of transmission repetitions
  mySwitch.setRepeatTransmit(TX_NUM_REPEAT);

}

void loop() {
  // Wait for 10 seconds
  Serial.println("Ringing door")bell;
  mySwitch.send(TX_SIGNAL);
  delay(10000);
}

In the code above, we are using the TX signal we decoded via rtl_433, and as we figured out from the wave pattern, this signal is being repeated 3 times, so we are emulating that in the code as well.

Now as soon as you flash this code, you should be able to hear your doorbell ring. This will continue every 10s. If you wish to stop, just unplug the arduino. You can also fire up GQRX and listen in to the frequency and verify that the signal you are transmitting matches the signal that was captured via GQRX for decoding.

In the next parts of This blog, we will be exploring various ways of transmitting the signal ( YardStick one, RpiTX on a raspberry pi ) as well as different signal decoding techniques. In the last part, ill go through the whole process of designing a simple but configurable 433mhz push button ( Like Amazon Dash ) which supports wifi as well as RF and can use IFTTT service. So stay tuned 🙂

Please feel free to ask / suggest me anything related.

Happy Hacking!

A Re-found love for electronics

We all know that the IOT phenomenon is on a full swing nowadays. The rapid development of new and low cost devices has fuelled this phenomenon.

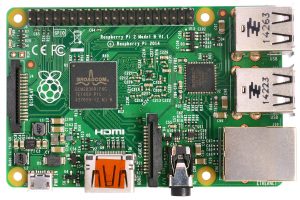
A year( or two) ago, i came across a new board, The Raspberry Pi – This is a cheap full blown computer with USB ports, ethernet ports, HDMI and GPIO ports. The best part is GPIO ports which lets you directly interact with hardware.It also lets you install many flavours of linux on it and has a 1Ghz CPU , and a dedicated GPU, which makes it much more powerful then regular Arduino boards.

Raspberry pi 2 Model b+

I did a lot of fun projects with the Raspberry Pi – some of which were software only and some hardware based. The ones i remember are :

  1. A Auto downloading web based torrent client using transmission- can be accessed from anywhere
  2. XBMC ( Now called Kodi ) : As a media library for my newly purchased TV
  3. Ambilight Clone with Ws2801 LED Strip and Raspberry pi
  4. Location based AC Switch with a IR led and Raspberry pi

But as i thought more about automating my home, the cost of raspberry pi became a big factor and  my interest slowly ebbed.

Until recently( a month ago ) when a friend told me about a marvellous new board – The ESP8266, A tiny board which contains a powerful wireless radio, with full TCP Stack and a integrated microcontroller and Almost 19 GPIO pins for a mere Rs150-250.

This sparked my interest. I have spent last 3 weeks ordering, playing and doing awesome stuff with the ESP8266. I have also started re-learning electronics from the ground up. I have re-built my electronics lab ( so to speak ) .

The coming posts on this blog will cover my experiments with the ESP8266, Ardunio , General Electronics and Software( which is my bread and butter ). I am writing a blog for the first time, so please bear with me and feel free to suggest/point out any mistakes/suggestions.

Time to Rock 🙂