In this post, we’ll show how to solve everyday niche problems with the help of AI and machine learning tools—even if you’re new to the field. With a few simple steps, we will build an Ai Powered , Vision based audio switcher.
Background
As an avid gamer with a triple-monitor setup, my PC handles everything from multitasking at work to entertainment and learning outside of work hours. I often switch between watching movies, reading, and gaming (love-hate relationship with DOTA2!), but constantly changing my audio output from headphones to speakers is a hassle.
Wouldn’t it be great if it could switch automatically? In the age of AI, this seemed possible!
With limited AI knowledge, I explored GitHub for solutions and found inspiration in projects using neural networks like VGG16 and YOLO. Rather than build on those, I decided to create my own system from the ground up—well, almost from scratch.
If you’re unfamiliar with neural networks, I recommend watching this excellent explainer by 3Blue1Brown, which covers the basics clearly and visually.
We chose the YOLO v11 model for its speed and compact size, making it ideal for edge devices like Raspberry Pi and low-powered microcontrollers. To accomplish our goal, we need to fine-tune this neural network to recognize headphones. This involves retraining the final layers, which requires:
- Collecting image data
- Cleaning the data
- Creating positive, negative, and validation sets
- Training the network
Think of it like gaining new skills in a familiar field—similar to a teacher receiving extra training in a new subject.
Now, Lets go through that List one by one.
Data Collection
Think of training our model like teaching a smart dog new tricks. While it already knows basic things (like spotting objects and people), we need to teach it exactly what we want it to find. For example, if we want it to spot people wearing headphones, we need to show it lots of examples of this.
I did some searching online and found a helpful resource: https://universe.roboflow.com/ginger-ojdx6/earphone-detection-75qzd
This website has two useful things:
- A collection of images we can use for training (called a dataset)
- A ready-made model that can detect earphones
Though there’s a pre-made model available, we’re going to build our own from scratch – it’s like cooking a meal yourself instead of ordering takeout. You learn more that way!
We’ll download the dataset in something called ‘YOLO format.’ We chose this format because it comes with special instruction files that tell our training program exactly what to look for in each image. It’s like having a detailed recipe that our computer can understand.
Environment Setup
To start coding, we’ll use Docker, as it provides a pre-configured environment with the base model and necessary dependencies. After a quick search, we found this Ultralytics Docker repo that includes CUDA, Python, and other essential libraries.
Since my system has an NVIDIA 3090 GPU, we’ll leverage that, but this setup can also work with other hardware—more on that in future posts.
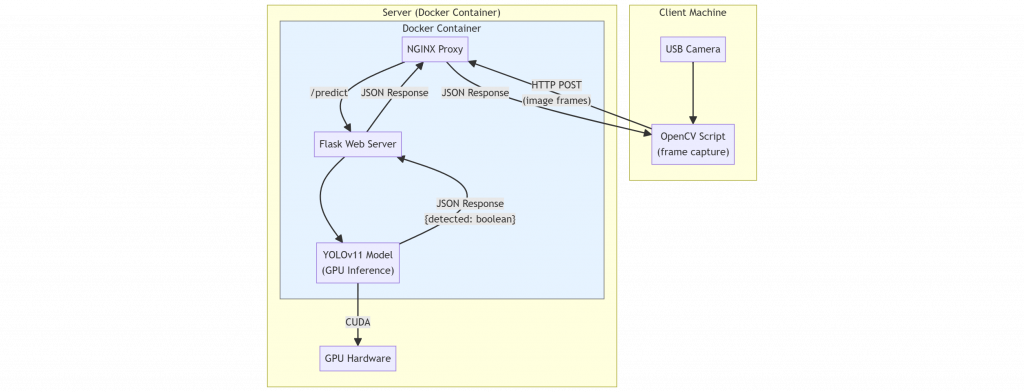
Our project will be split into two parts: a server and a client. The server will accept an image, process it with the model, and return results (whether headphones are detected or not, along with confidence scores and bounding boxes). The client will run on the user’s machine (which doesn’t need a GPU) and will use a webcam to capture frames at 3 FPS. These frames will be sent to the server for processing. If headphones are detected, the client will trigger an action, like switching the audio output.
Most of the code has been generated with the help of AI tools like Claude.ai and ChatGPT. I view AI as a great tool to speed up development, and I’ll share the prompts used in the GitHub repository.
For the server, I based it on the Ultralytics Docker image and added Nginx for reverse proxy functionality. This allows the server to serve static content (such as images with bounding boxes) and provides added security. For more on reverse proxies and Nginx setup, check out this excellent tutorial on DigitalOcean.
Note: We’re using Ubuntu for the server, as I already have a working Docker setup on an Ubuntu machine with a GPU. This machine also serves as my media server.
Training the model
Now that we have the data ( this is a already partitioned data , means its already split train, test and validate data – we don’t have to manually split it again ). Lets take a look at the data
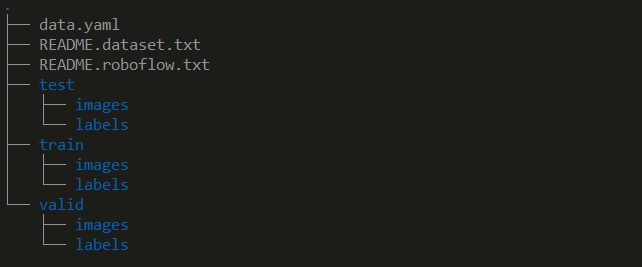
Our data is already split into three directories—train, test, and valid—so no manual partitioning is necessary:
- Train: Used for the actual model training, containing about 70% of the data.
- Valid: Evaluates model performance during training with around 20% of the data.
- Test: Used to assess final accuracy, containing roughly 10% of the data.
For more on label formats and model requirements, see this Ultralytics YOLO guide.
Run docker interactively to train the model
Since we’re using the Ultralytics Docker image, the following command initiates training:
bashCopy codesudo docker run -it --rm --ipc=host -v ./:/app -v ./models:/models --gpus all ultralytics/ultralytics
Run this command from the directory where the repository is cloned. This creates an interactive shell with two mounted volumes:
- The current directory as
/app - The models directory as
/models
Think of mounts as file sharing between Docker and the host. Once inside the shell, proceed with the following steps.
The Server Code
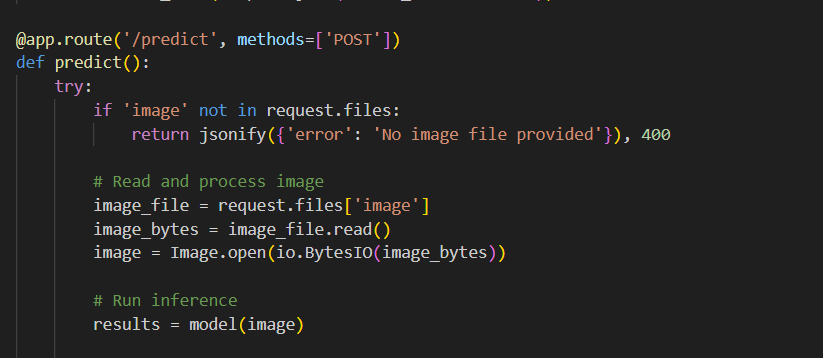
The code for the server is fairly simple, First we load the model

Then we open up a endpoint which receives images. and then we run ultralitics inference on that image ( already initialized with our custom model ).
The Client / End Device code
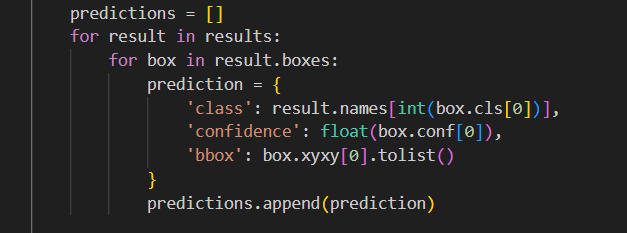
After that we send the results to the client via JSON.

please note the format here , it returns class, confidence and bbox ( bounding box ) . Class is, what is being detected, confidence is : the confidence that the class is correct and bbox is bounding box ( a box around the item which was detected ) .
Now lets jump to the client side.
The Client Code
The client is a straightforward Python script I mostly built with ChatGPT’s assistance—why reinvent the wheel? This script reads the video stream from the camera at a frame rate of 2 FPS (just enough to check for headphones without overloading the server; even 1 FPS would suffice).
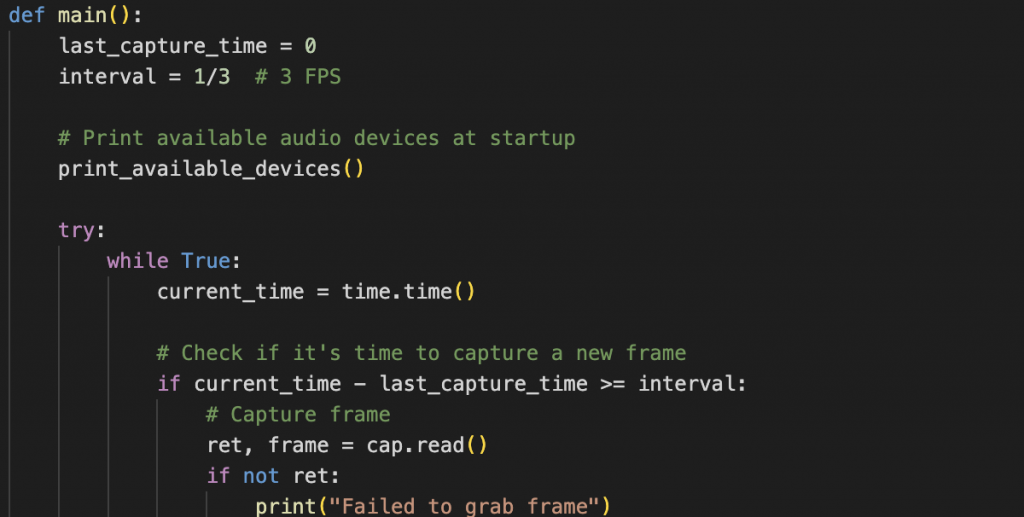
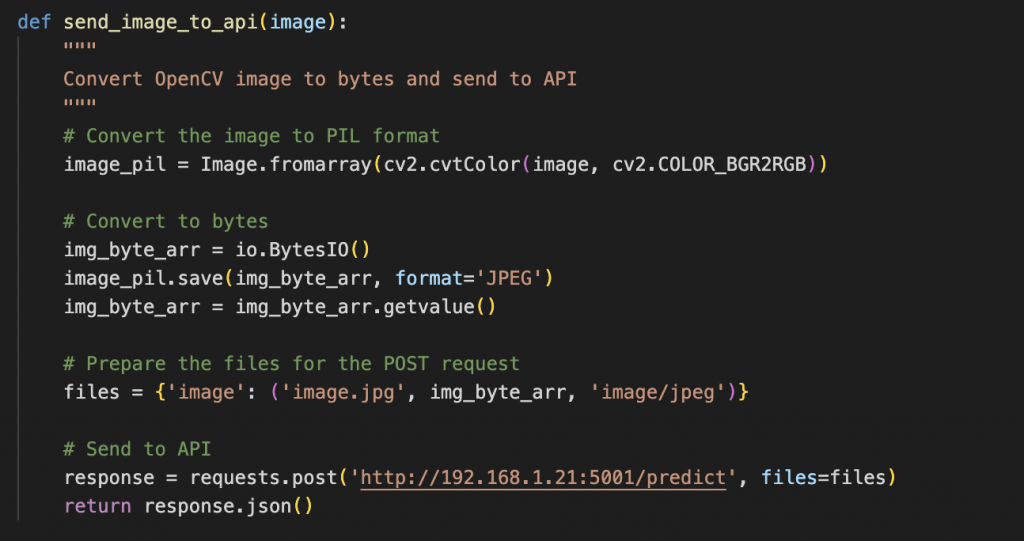
The second part of the code is a function that sends each captured frame (image) to the server created in the previous step and reads the response. If the server response includes labels like “headphone” or “earphone,” the function triggers audio output switching.
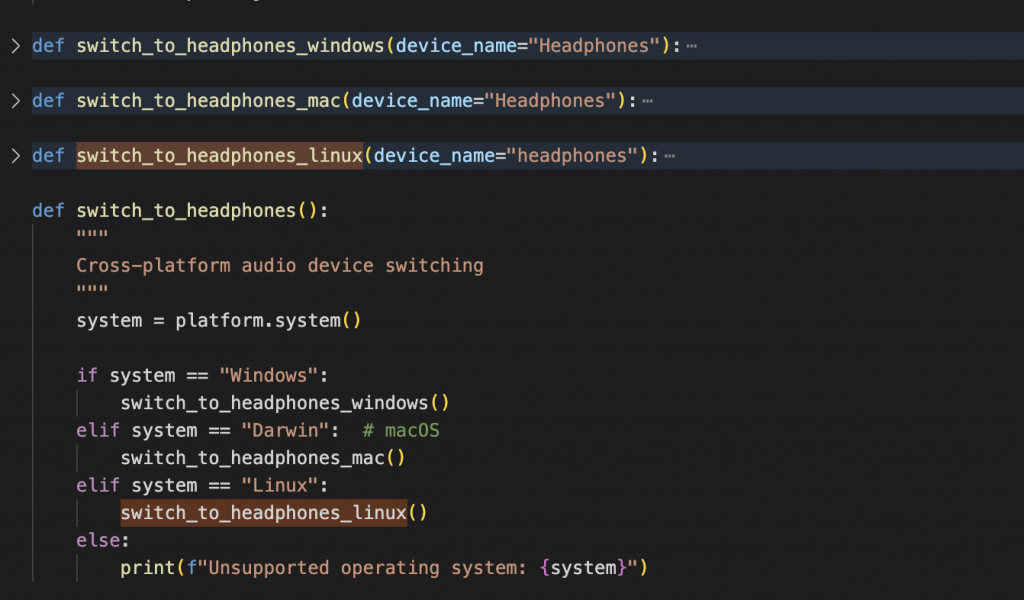
The final part is the audio switcher code, which adjusts based on the operating system:
- Windows: Uses
pycaw - macOS: Uses
applescript - Linux: Uses
pactlwith PulseAudio
Each method is implemented in a separate function, tailored to its respective OS. Check the code for specific implementation details.
Wrapping up
And there you have it! We’ve built a fully functional local model and service that can handle a real-world task with minimal effort. While this approach is hands-on, there are even easier alternatives, like using AutoML services to automate much of this process. Let me know if you’re interested—we can explore AutoML in upcoming articles!
Please feel free to go through, fork and modify this github repo hosting the above code
https://github.com/shreyasubale/headphone-audio-switcher
Happy Hacking !

